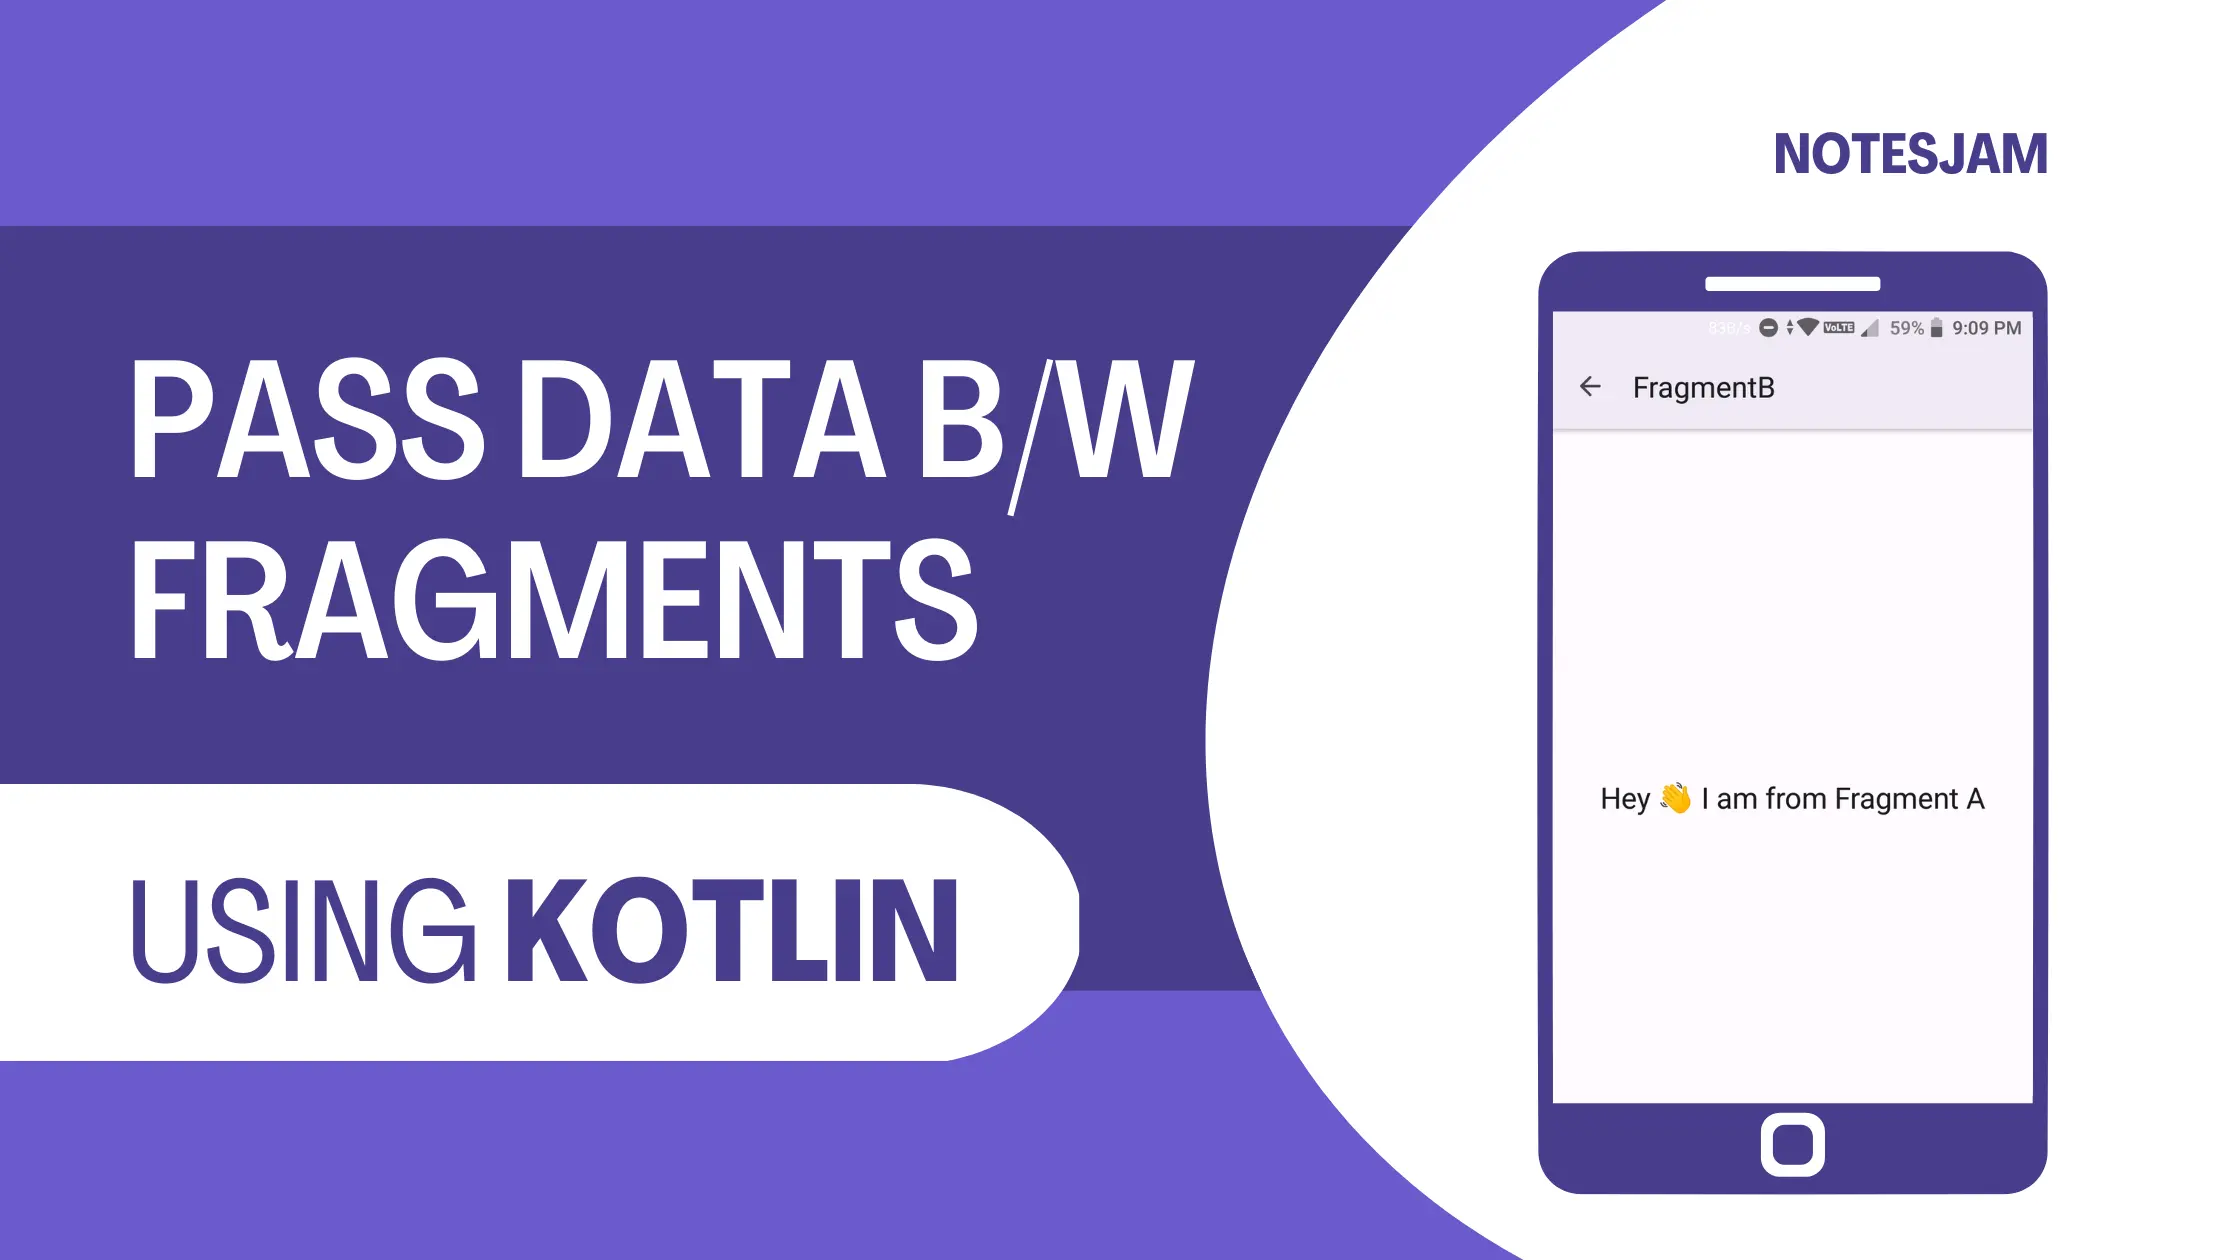
Passing data between fragments is a common task in Android development. With the introduction of the Navigation Component in Android Jetpack, passing data between fragments has become easier and more efficient.
In this article, we will learn how to pass data between fragments using SafeArgs in Kotlin.
SafeArgs is a Gradle plugin that generates a class for each fragment with arguments that can be used to pass data between fragments. SafeArgs helps in type-safe argument passing and reduces the chances of errors while passing data between fragments.
Let’s get started by creating a new project in Android Studio and adding the Navigation Component to the project.
Create Project
Open Android Studio and create a new project. Give the project name SafeArgsDemo.
How to Create a New Project in Android Studio
After creating the project in Android Studio, add the Navigation Component to the project. To add the Navigation Component, add the following dependencies in the app-level build.gradle file.
Navigation Component dependency
dependencies {
    def nav_version = "2.3.5"

    implementation "androidx.navigation:navigation-fragment-ktx:$nav_version"
    implementation "androidx.navigation:navigation-ui-ktx:$nav_version"
}
SafeArgs plugin is included in the Navigation Component library and can be added to your project by adding the following dependency in your top-level build.gradle file:
Android safe-args dependency
buildscript {
    repositories {
        google()
    }
    dependencies {
        def nav_version = "2.5.3"
        classpath "androidx.navigation:navigation-safe-args-gradle-plugin:$nav_version"
    }
}
And add the following plugin to your app-level build.gradle file.
plugins {
  id 'androidx.navigation.safeargs.kotlin'
}
Create two fragments, FragmentA and FragmentB, and add them to the navigation graph.
To create a navigation graph, create a new XML file named navigation.xml in the res folder of the project. Then, add the following code to the navigation.xml file.
navigation.xml
<?xml version="1.0" encoding="utf-8"?>
<navigation xmlns:android="http://schemas.android.com/apk/res/android"
    xmlns:app="http://schemas.android.com/apk/res-auto"
    xmlns:tools="http://schemas.android.com/tools"
    android:id="@+id/navigation"
    app:startDestination="@id/fragment_a">

    <fragment
        android:id="@+id/fragment_a"
        android:name="com.example.safeargsdemo.FragmentA"
        tools:layout="@layout/fragment_a">

        <action
            android:id="@+id/action_fragment_a_to_fragment_b"
            app:destination="@id/fragment_b"
            app:popUpToInclusive="true" />
    </fragment>

    <fragment
        android:id="@+id/fragment_b"
        android:name="com.example.safeargsdemo.FragmentB"
        tools:layout="@layout/fragment_b">

        <argument
            android:name="msg"
            app:argType="string" />
    </fragment>
</navigation>
In the above code, we have added two fragments, FragmentA and FragmentB, to the navigation graph. The start destination of the graph is FragmentA.
In the above code, we have added an argument named msg of type string to our FragmentB. This argument will be used to pass data between fragments using SafeArgs.
The argument can be accessed in your code using the FragmentBArgs class, which is automatically generated by the SafeArgs plugin.
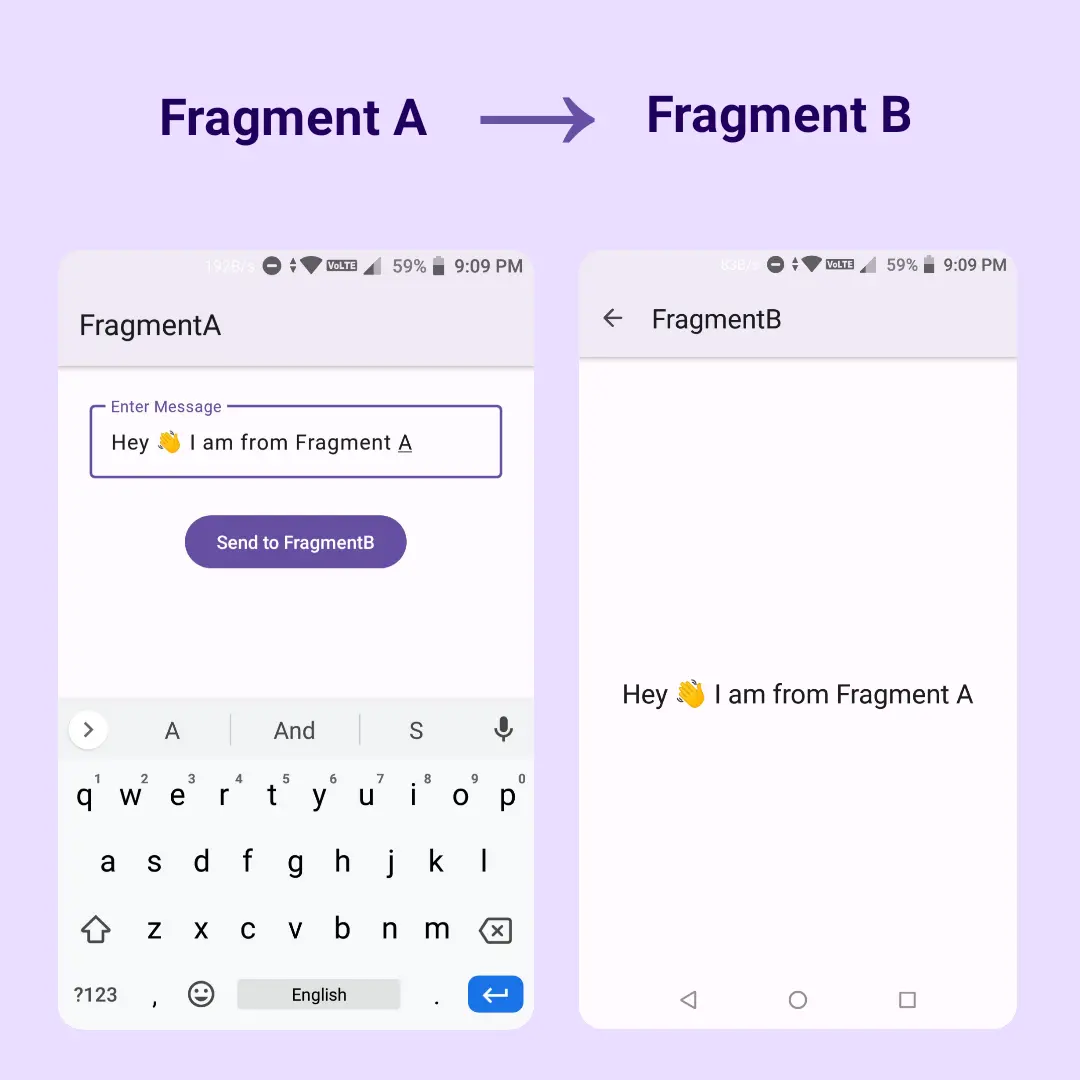
In FragmentA, add a button and navigate to FragmentB on the button click.
FragmentA.kt
package com.example.safeargsdemo

import android.os.Bundle
import androidx.fragment.app.Fragment
import android.view.LayoutInflater
import android.view.View
import android.view.ViewGroup
import androidx.navigation.fragment.findNavController
import com.example.safeargsdemo.databinding.FragmentABinding

class FragmentA : Fragment() {
    private var _binding: FragmentABinding? = null
    private val binding get() = _binding!!

    override fun onCreateView(
        inflater: LayoutInflater, container: ViewGroup?,
        savedInstanceState: Bundle?
    ): View {
        // Inflate the layout for this fragment
        _binding = FragmentABinding.inflate(layoutInflater)
        return binding.root
    }

    override fun onViewCreated(view: View, savedInstanceState: Bundle?) {
        super.onViewCreated(view, savedInstanceState)

        // Passing data on button click
        binding.sendData.setOnClickListener {
            // Getting data from edittext
            val dataEditText = binding.dataPassed.text.toString()

            // Sending the data to FragmentB using safeargs
            val direction = FragmentADirections.actionFragmentAToFragmentB(dataEditText)
            findNavController().navigate(direction)
        }
    }

    override fun onDestroyView() {
        super.onDestroyView()
        _binding = null
    }
}
In the above code, we have added a button in FragmentA and created an action to navigate to FragmentB with data. Here, data is a string that we want to pass to FragmentB.
In FragmentB, retrieve the data passed from FragmentA using SafeArgs.
FragmentB.kt
package com.example.safeargsdemo

import android.os.Bundle
import androidx.fragment.app.Fragment
import android.view.LayoutInflater
import android.view.View
import android.view.ViewGroup
import androidx.navigation.fragment.findNavController
import androidx.navigation.fragment.navArgs
import com.example.safeargsdemo.databinding.FragmentBBinding

class FragmentB : Fragment() {
    private var _binding: FragmentBBinding? = null
    private val binding get() = _binding!!
    private val args: FragmentBArgs by navArgs()

    override fun onCreateView(
        inflater: LayoutInflater, container: ViewGroup?,
        savedInstanceState: Bundle?
    ): View {
        // Inflate the layout for this fragment
        _binding = FragmentBBinding.inflate(layoutInflater)
        return binding.root
    }

    override fun onViewCreated(view: View, savedInstanceState: Bundle?) {
        super.onViewCreated(view, savedInstanceState)

        // Getting data
        val data = args.msg

        // Setting the data in textview
        binding.dataPassed.text = data

        // Closing the fragment on back press
        binding.toolbar.setNavigationOnClickListener {
            findNavController().popBackStack()
        }
    }

    override fun onDestroyView() {
        super.onDestroyView()
        _binding = null
    }
}
In the above code, we have retrieved the data passed from FragmentA using SafeArgs. We have used the navArgs() delegate to retrieve the data. navArgs() is a delegate that provides type-safe access to the arguments passed to the fragment.
Layout file of activity and fragments
Below are the layout XML files for FragmentA, FragmentB, and MainActivity. These files define the user interface for each component of the application
FragmentA layout XML file
This file defines the layout for FragmentA. It contains an EditText view to allow the user to enter some text, and a Button view to submit the text to FragmentB.
<?xml version="1.0" encoding="utf-8"?>
<androidx.coordinatorlayout.widget.CoordinatorLayout
    xmlns:android="http://schemas.android.com/apk/res/android"
    xmlns:app="http://schemas.android.com/apk/res-auto"
    xmlns:tools="http://schemas.android.com/tools"
    android:layout_width="match_parent"
    android:layout_height="match_parent"
    tools:context=".FragmentA">

    <com.google.android.material.appbar.AppBarLayout
        android:layout_width="match_parent"
        android:layout_height="wrap_content"
        android:elevation="0dp"
        android:fitsSystemWindows="true"
        app:liftOnScroll="false">

        <com.google.android.material.appbar.MaterialToolbar
            android:id="@+id/toolbar"
            android:layout_width="match_parent"
            android:layout_height="wrap_content"
            app:title="FragmentA" />
    </com.google.android.material.appbar.AppBarLayout>

    <androidx.core.widget.NestedScrollView
        android:layout_width="match_parent"
        android:layout_height="match_parent"
        app:layout_behavior="com.google.android.material.appbar.AppBarLayout$ScrollingViewBehavior">

        <androidx.appcompat.widget.LinearLayoutCompat
            android:layout_width="match_parent"
            android:layout_height="wrap_content"
            android:layout_margin="24dp"
            android:orientation="vertical">

            <com.google.android.material.textfield.TextInputLayout
                android:layout_width="match_parent"
                android:layout_height="wrap_content"
                android:hint="Enter Message">

             <com.google.android.material.textfield.TextInputEditText
                    android:id="@+id/data_passed"
                    android:layout_width="match_parent"
                    android:layout_height="wrap_content"
                    android:inputType="textPersonName|textMultiLine" />
            </com.google.android.material.textfield.TextInputLayout>

            <Button
                android:id="@+id/send_data"
                android:layout_width="wrap_content"
                android:layout_height="wrap_content"
                android:layout_gravity="center"
                android:layout_marginVertical="24dp"
                android:text="Send to FragmentB" />
        </androidx.appcompat.widget.LinearLayoutCompat>
    </androidx.core.widget.NestedScrollView>
</androidx.coordinatorlayout.widget.CoordinatorLayout>
In the above code, we have created an EditText and a Button. When the user enters some text into the EditText and clicks the Button, FragmentB will open and display the data that was entered into the EditText.
FragmentB layout XML file
This file defines the layout for FragmentB. It contains a TextView view to display the text that was entered in FragmentA.
<?xml version="1.0" encoding="utf-8"?>
<androidx.coordinatorlayout.widget.CoordinatorLayout xmlns:android="http://schemas.android.com/apk/res/android"
    xmlns:app="http://schemas.android.com/apk/res-auto"
    xmlns:tools="http://schemas.android.com/tools"
    android:layout_width="match_parent"
    android:layout_height="match_parent"
    tools:context=".FragmentB">

    <com.google.android.material.appbar.AppBarLayout
        android:layout_width="match_parent"
        android:layout_height="wrap_content"
        android:elevation="0dp"
        android:fitsSystemWindows="true"
        app:liftOnScroll="false">

        <com.google.android.material.appbar.MaterialToolbar
            android:id="@+id/toolbar"
            android:layout_width="match_parent"
            android:layout_height="wrap_content"
            app:navigationIcon="@drawable/round_arrow_back_24"
            app:title="FragmentB" />
    </com.google.android.material.appbar.AppBarLayout>

    <TextView
        android:id="@+id/data_passed"
        android:layout_width="match_parent"
        android:layout_height="match_parent"
        android:gravity="center"
        android:text="Passed data"
        android:textAppearance="?attr/textAppearanceTitleLarge"
        app:layout_behavior="com.google.android.material.appbar.AppBarLayout$ScrollingViewBehavior" />
</androidx.coordinatorlayout.widget.CoordinatorLayout>
In the above code, we have created a TextView. When the user clicks the Button in Fragment A, Fragment B will open and display the data in the TextView.
MainActivity layout XML file
This file defines the layout for the MainActivity. It contains a FragmentContainerView that serves as the container for both FragmentA and FragmentB.
<?xml version="1.0" encoding="utf-8"?>
<androidx.constraintlayout.widget.ConstraintLayout xmlns:android="http://schemas.android.com/apk/res/android"
    xmlns:app="http://schemas.android.com/apk/res-auto"
    xmlns:tools="http://schemas.android.com/tools"
    android:layout_width="match_parent"
    android:layout_height="match_parent"
    tools:context=".MainActivity">

    <androidx.fragment.app.FragmentContainerView
        android:id="@+id/fragment_host_main"
        android:name="androidx.navigation.fragment.NavHostFragment"
        android:layout_width="match_parent"
        android:layout_height="match_parent"
        app:defaultNavHost="true"
        app:layout_constraintBottom_toBottomOf="parent"
        app:layout_constraintEnd_toEndOf="parent"
        app:layout_constraintStart_toStartOf="parent"
        app:layout_constraintTop_toTopOf="parent"
        app:navGraph="@navigation/navigation" />
</androidx.constraintlayout.widget.ConstraintLayout>
Output
Build the project and run it. Click on the button in FragmentA, and you will see the data “Hey, I am from FragmentA” displayed in FragmentB.
That’s it! We have successfully passed data between fragments using SafeArgs in Kotlin.
Benefits of SafeArgs
SafeArgs provides several benefits, including:
Type-safety: SafeArgs generates a class for each fragment with arguments that can be used to pass data between fragments. This ensures that the data passed between fragments is of the correct type and reduces the chances of runtime errors.
Efficiency: SafeArgs generates code that is optimized for performance, making it more efficient than other methods of passing data between fragments.
Error-free: Since SafeArgs generates code at compile-time, it reduces the chances of errors that may occur while passing data between fragments.
In conclusion, SafeArgs provides a type-safe way to pass data between fragments in the Navigation Component.
It eliminates the need for writing boilerplate code and reduces the chances of errors while passing data between fragments.
With SafeArgs, passing data between fragments has become easier and more efficient.
I hope this article helps you understand how to pass data between fragments in the navigation component using Android SafeArgs.
So, go ahead and try it out today!


Leave a Reply